[ page 1 ]
Lockheed T-33 T-bird in 1/72 scale: kit reviews & modelling reports
page 2
page 3
page 4
page 5

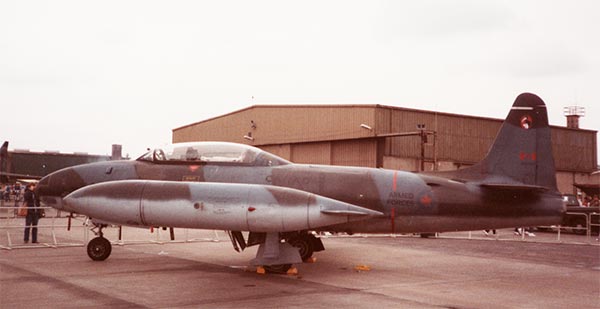
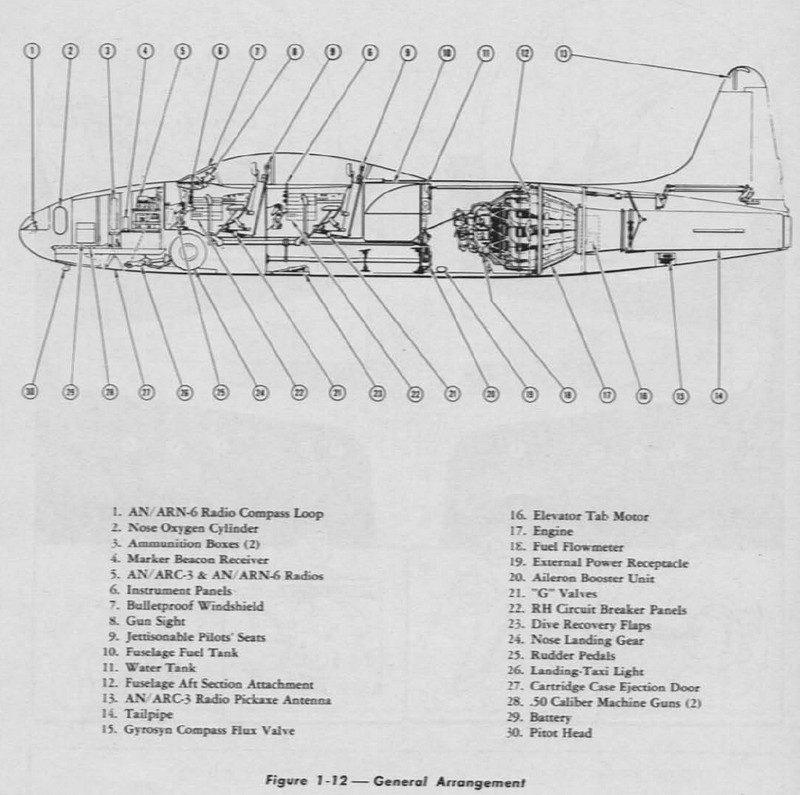
The Lockheed T-33 was developed into a two seat jet trainer, based on the F-80 Shooting Star. Design work for the P-80 began in 1943 with the first flight on 8 January 1944. Following on the Bell P-59, the P-80 became the first jet fighter to enter full squadron service in the United States Army Air Forces. As more advanced jets entered service, a jet trainer was needed. The Lockheed P-80/F-80 fuselage was by lengthened by slightly over three feet and adding a second seat, instrumentation and flight controls. Called the T-33 "T-Bird" it had some sort of jettisonable seats in early T-33's. During the T-33 usage, the seat was modified several times with a different parachute or other seats were installed. During its long service life at an air force, often new seats were installed in their T-33 like the MB Gu5 seat.
The trainer was initially designated as a variant of the P-80/F-80, the TP-80C/TF-80C. The TF-80C made its first flight on 22 March 1948 with US T-33 production taking place from 1948 to 1959. The U.S. Navy called the type TO-2/ TV-2 but most were the T-33A. The jet engine was the Allison J33-A-35 and electric motors to drive the wing flaps and dive flaps. (The Canadian licensed made CL-30 / T-33 "Silver Star" had the Nene engine).
photos made at Ramstein in the 1990s of a Canadian T-33 and USAF T-33

Some 6,500 T-33's were manufactured and not only used by the USAF but also by NATO countries as well as in South American air forces. It was also widely used by the JASDF in Japan. The RT-33 is the reconnaissance version with a camera in the nose. Some T-33 with this role were standard but had a camera in a modified tip tank.
USAF Technical order TO 1-1-4 colour information about the T-33:

For more info, see the references...
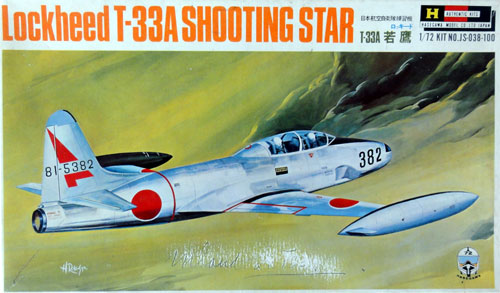

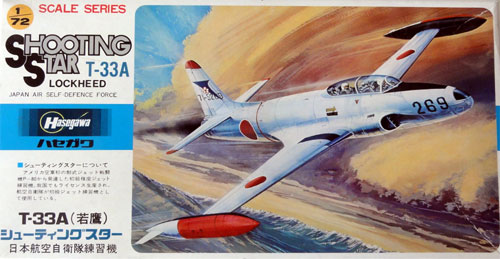
The classic T-33 model in 1/72 scale is the old Hasegawa T-33A kit. First released as kit #JS-038 in 1969, the kit is now rather antique. The Japan Self Defense Air Force used the T-33 so it was logical that Hasegawa came with a kit. The kit has re-popped in many Hasegawa releases over the last decades, including releases by Minicraft USA and AMT.

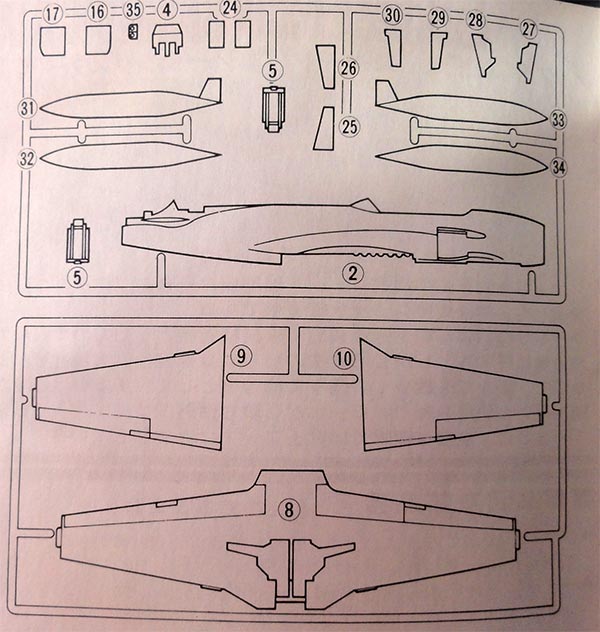
The kit has about 36 parts in hard brittle plastic and the few panel lines are raised.

Decals are simple with in this release only a JASDF jet in a bare metal finish. (strangely a USAF scheme is also shown but there are no USAF decals...).
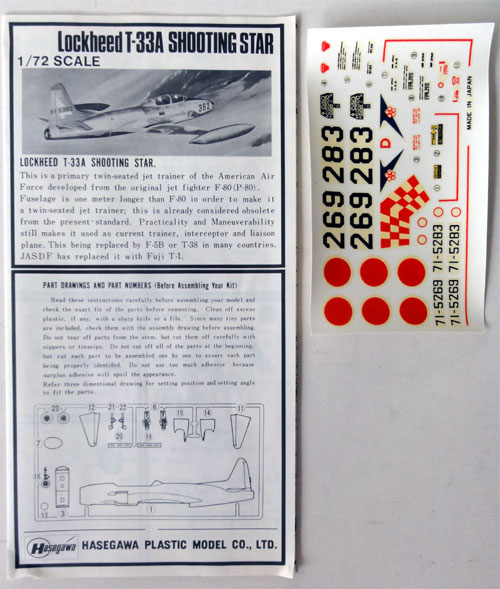

Note the old tube of glue supplied in the kit! Nostalgia!

The Hasegawa kit cockpit is a simple tub and 2 simple seats, a forward instrument panel is not provided. A pair of pilot control sticks are missing. But you get 2 pilot figures in the kit but they are a bit crude. The best option is to make the kit with the thick single part canopy set closed. Don't forget to a add nose weight to avoid a "tail sitter". The intake splitter plates are nicely done.
I had a few Hasegawa T-33 kits and found that later released kits have a lot of flash in the sprues that need cleaning up.
(It is noted that in 2017 a much better and very good 1/72 T-33 kit was released by PLATZ and the same kit by Italeri; a few of these kits were also purchased, see page 2.... ).
What are issues with the Hasegawa T-33 kit?
[1] The Hasegawa clear canopy hood is one piece, is quite thick and has an inaccurate wind shield shape. It looks also a bit too shallow but is hard to correct. Note that on many T-33's a sort of mid-frame is seen, but this is not in the canopy but is on the inside of the cockpit and has often the lines for training blinds.
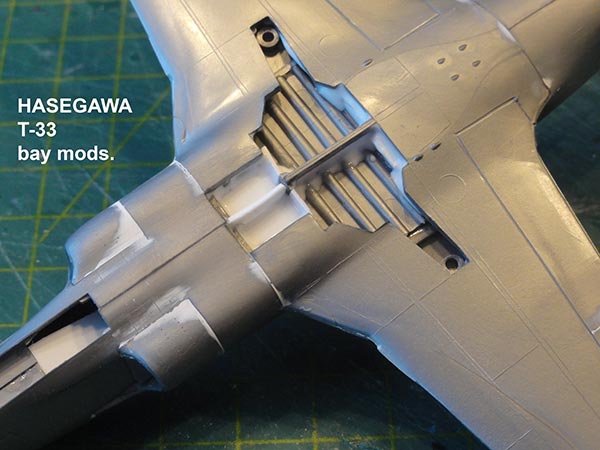
[2] The main gear bays have strange ribs on their "ceiling" and no enclosures. The central bay beam is also missing. I used the PLATZ kit as guide "how to". So cut away the "T shape" in wing part #8. Enclose the bays with plastic card and use white glue to close the smaller gaps. A few thinner side struts from plastic rod can be added as well.
The nose wheel gear bay is also very simple with a big gap that is better boxed in with card. Also add a rear strut.
The gear bays are inside usually grey (MIL 34151) or FS36473 as per USAF specification. But there are variations, particularly at other air forces with interior chromate green, interior green or aluminium. The insides of gear doors and the gear struts are usually bare metal or painted aluminium. Some black wash and a few brake lines can also be added inside the bays and gears to add realism.
The nose gear doors are to be set at about 30 degrees angle.
[3] The lower dive flaps recesses are inaccurate on the inside. So some improvement here is recommended; there is a v-shaped gap between the pair. These dive flaps are mostly seen drooped on parked T-33's though they are electrically driven with 2 possible positions: up or fully down. Their actuators can be made from plastic rod. If you want dive flaps closed, it is better to install them and than putty and sand the area flush. Suggest than the dive flaps with soft pencil outlines.
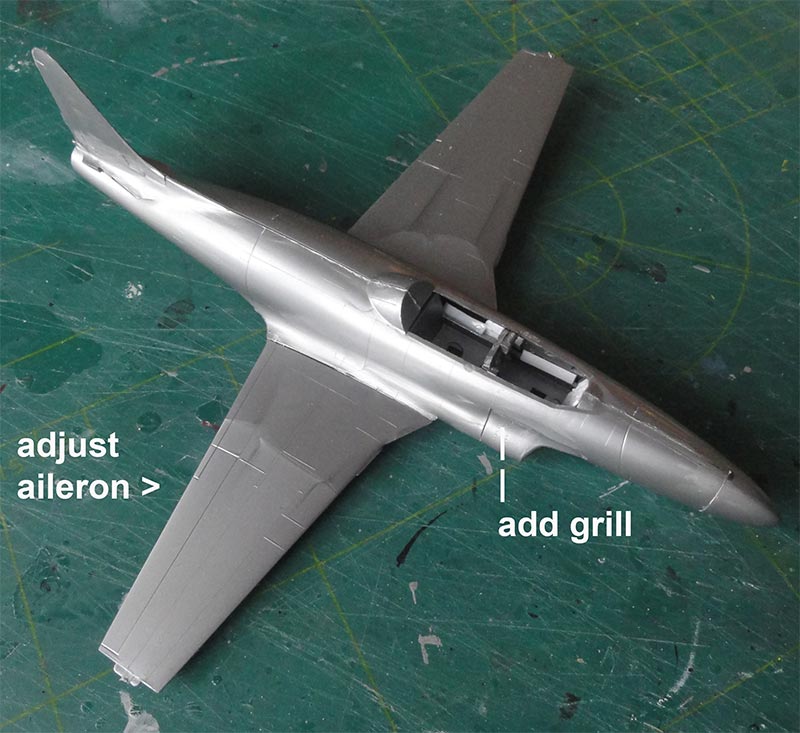
[4] The moulded ailerons have a far too big wide, they should have a wide of 32 mm in 1/72; this can be corrected easily with closing the inside aileron outlines with putty and inscribing new lines. New aileron edges were cut with the razor saw to add realism.
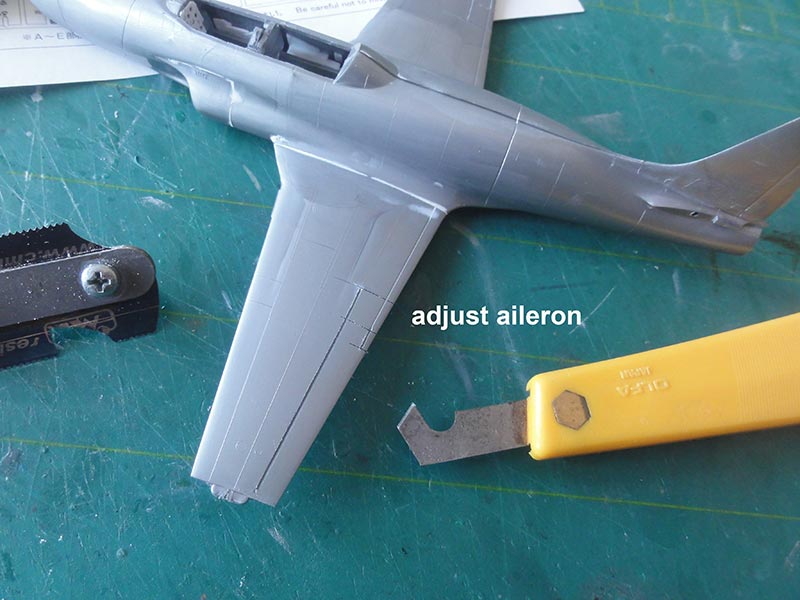
Than ailerons were also enscribed deeper with an OLFA P-cutter as were the flap outlines in the lower wing.
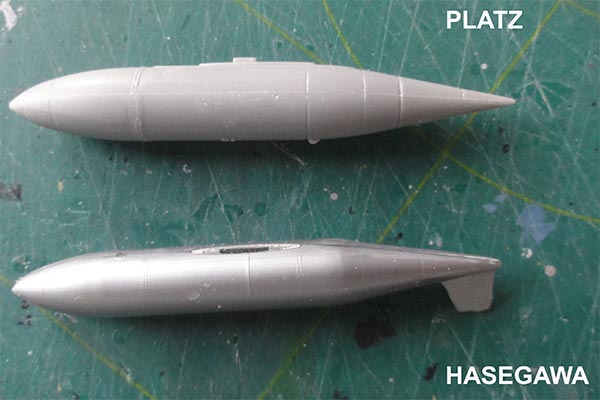
[5] The Hasegawa Fletcher 230 gallon wing tip tanks kit are very inaccurate. The tanks in the Hasegawa kit have a diameter of 8,2 mm which should be about 9,3 mm and also have incorrect tank fins. Their much too small volume really makes a difference and the only option is to find other tanks.
It appears that the early T-33's could also fly with the Misawa tanks as used on the P-80. If you want those, the Misawa tanks can be found in the 1/72 Airfix P-80 Shooting Star kit. (Airfix promised to re-release this kit in 2022 again). The photo below shows the T-33 at top and the Airfix P-80 wing lower with its Misawa tank:
![misawa]](misawa-tank.jpg)
The other option is not to install wing tip tanks at the Hasegawa T-33 model. Though seen rarely, the T-33 could fly without these wing tip tanks; in that case 2 small about 2 mm wing tip extensions should be added to the kit wing, this can be done with plastic card and putty.
[6] T-33's had electrically driven wing flaps. Most photos show that parked T-33 have their flaps lowered. There is a "control surfaces lock" in the actual T-33 cockpit but I suspect many pilots kept the flaps drooped after landing to ease maintenance and inspection. So it is up to the modeller to decide how to show the model. All 1/72 T-33 kits have closed up flaps, so I you want drooped flaps you will need to do some surgency and scratch building.
[7] The cockpit interior is painted mainly medium grey with small black dots and the kit instrument decals. The kit seats are not that bad at all, real T-33's had simple jettisonable seats (so not a so called ejection seat with rocket motor). The old style seat had red head rests and dark or medium grey frames and tan or olive green harnesses that can be suggested with painted tape slices.

NOTE: there are a few after market sets for the T-33, such as from Pavla S 72018 for 1 resin seat. But these resin seat looks far too small.

Other tips when building the Hasegawa T-33 kit:
- the model needs nose weight to avoid "tail sitting".
- inscribe a pair of small missing vents/ grills on each side of the intake.
- T-33's have at least 4 small anti-collision lights; these can be made from very tiny bits of clear red and clear blue plastic. They are located just forward of the outside aileron edges on both upper and lower wing surfaces (and anti-collision lights are seen on the outsides of the wing tip tanks). On the spine a clear anti-collision light was set and at the belly aft of the wing (so not red).
- In the kit a tiny pitot tube below the nose is missing. This can be made from scrap as well as the small antenna in front of the nose gear and a larger antenna aft of the nose gear bay.
It was decided to make a few Hasegawa T-33's even though they are rather old and improve these a bit.
The fit of the first Hasegawa kit which was an early manufactured release is surprisingly good. I tried to retain the few raised panel lines and the cockpit will be set closed.

The fuselage halves were joined, but first the cockpit sides on the inside closed with card and white glue. Cockpit detailling will be done later. The wing was set and the fit was not that bad. Ailerons were adjusted as described above and a vent/ grill inscribed at the intake sides.

The model needs nose weight, than set the nose part #7. Some putty and sanding was than done at wing joints, intakes and tail fin.

The model was checked for any flaws and got an airbrushed base grey coat with Revell Aqua 75 grau acrylic.
T-33's have various paint schemes as per particular air force specification. Often also a bare natural metal finish though some have "painted metal/aluminium" paint, so study photos for your desired scheme.
If choosing a NMF natural aluminium finish, different approaches are possible.
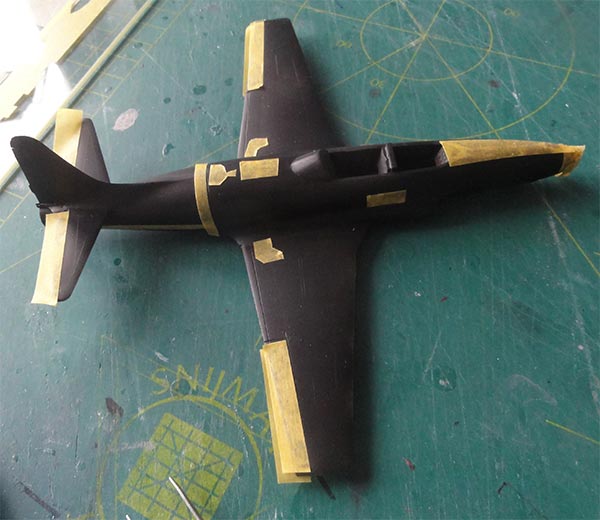
The first model was finished with the ALCLAD system which requires a gloss black undercoat and and airbrush.
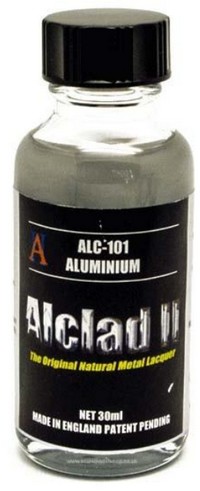


ALC-119 airframe aluminium was used. Wear a face mask while airbrushing! Some individual panels were suggested with less effort using the trick described on my MiG-15 page here...
The gloss black undercoat.
.. after some tape removal..

.... the final metal coats now followed. The results look good.
TIP: another simpler way is to airbrush metallic aluminium is to use acrylic paints such as Vallejo metal color 77.701 aluminium. Thin with the appropriate Vallejo thinner 71.061 and add a few drops of "flow improver" 71.262.


The model will look a bit less shinier than with ALCLAD but on many real used T-33's realistic enough.
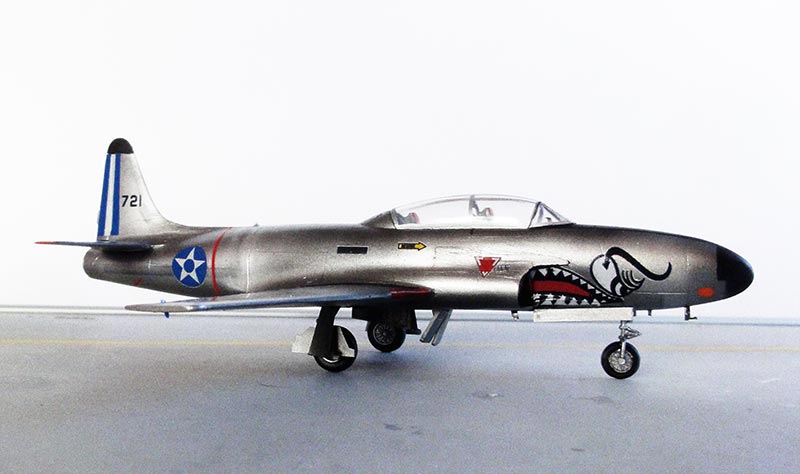
The first Hasegawa 1/72 kit was to be made in a scheme of the GUATAMALA air force air demonstration team "Los Qetzales". This team of the "Fuerza Aerea Gualtemalteca" flew in 1970 often without tip tanks at shows (so the inaccurate kit parts discarded). On each wing tip, a small span extension of 2 mm was added with card. Each tip extension was blended in with putty and sanding.
The model would be made for a parked "T-33A with flaps up and locked". The dive flaps would be set "lowered".
The bare finish is natural aluminium so the ALCAD technique was used. Do not forget to airbrush the small bits like the gear doors.
Some outside panels were painted matt black such as on the nose. There are variations seen here on T-33's. I was not sure about the anti-glare panel colour for the Guatamala T-33; this was also airbrushed black but is also often very dark green such as FS34079.
Some Promodeller wash was added in the inscribed aileron edges and lower flaps edges. Or use a mix of black and varnish. I also used a soft pencil to suggest a few panels.

The "Los Qetzales" markings were home designed and custom OKI laser printed in 1/72 scale. The shark teeth is also a decal. Required was cutting out all the decals separately from the single carrier film.
At this stage the decals were set as landing gear was not installed yet to avoid damage.
The gear bays were painted interior green but the door insides remained NMF. The colours may vary between T-33 and per air force, so some "guestimations" were needed here. A few tiny hydraulic lines were suggested with thin metal wire.

The canopy was set closed for a just parked jet. I needed to scrape off a bit of clear plastic thickness with an X-acto knife on the inside edges. The canopy will than fit without too large fuselage gaps.
Before setting the canopy, its frames were painted aluminium. Inside, I suggested a sort of internal cockpit mid inside frame with a decal. Two mirrors were set inside made from tiny etched metal bits and set with white glue.

In the kit the tiny pitot tube below the nose is missing. This was made from scrap as were the small antenna in front of the nose gear and a larger antenna aft of the nose gear bay. Add a fuel dump pipe at the right rear fuselage, I used red stretched sprue.
All was set to dry for 24 hours. The canopy was installed with white glue that also closed the small gaps. When dried, the edges were painted aluminium with a very fine brush.
GUATAMALA
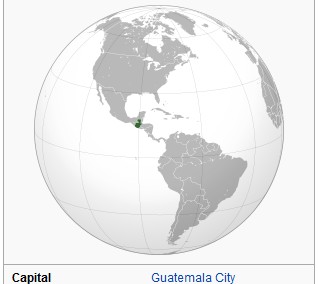


[ 108,900 sq.km | 17,6 million inhabitants | capital: Guatamala city | GDP US$ 4,500 per capita nominal ]
Military Aviation started in Guatamala already in 1912 with biplanes of Bleriot and Nieuport. The built-up was with French aviators and flying schools established. The Fuerza Aerea Guatemalteca was formally set in place in 1945 with many American aircraft used like the F-51, C-47 Dakota and later on T-33 trainers. The T-33A-1-LO was their first jet and some 8 were delivered from the USA from 1963-1965. Probably Paraguay received 6 Lockheed AT-33A Shooting Star donations after the visit of President Andrés Rodríguez to Taiwan in 1990, which arrived at the Air Force Group in January 1991.
Main bases are at Guatamala city/ La Aurora, Flores and Retalhuleu.
For more information about this air force, look at the Cessna A-37 page here.


... at base area ...


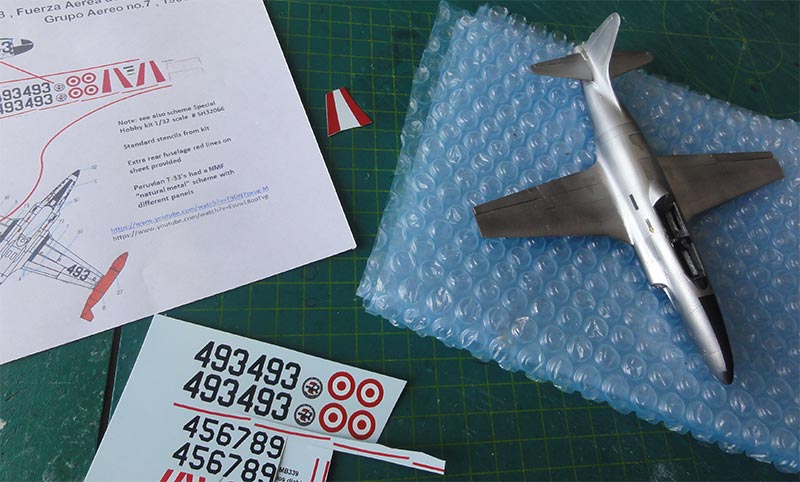
Another Hasegawa T-33A kit was made, similarly as described above. The scheme would be for a PERU air force T-33A and again markings were home designed and custom laser printed. (Note: I had an old Microscale T-33 set #72-409 but these had oversized roundels).
For this model it was decided to make an "engine running" T-33A with pilot figures set in the cockpit and closed flaps and closed dive flaps.
The bare finish is again natural aluminium using the ALCAD technique.
The wing tip tanks of the kit are unusable and were made from scrap using bits from the spares box. (I needed the tanks in other kits I had for those).

The wing tip tanks have a rather non-standard colour with the upper areas being gloss red-orange and not with an anti-glare inside.

The self designed OKI laser printed decals were set onto the model at this stage with no details such as landing gear installed yet to avoid damage.
The canopy was set closed as described above. But first a few pilot figures were installed. Good ones were found in the spares box.

I had to chop off their legs in order to have them fit on the seats. The helmets and gear were painted, a few control sticks added in the cockpit and were a few instrument decals. I suggested the harness with paint.
The landing gears were installed and painted as decribed earlier above.
Add the missing small pitot, fuel dump pipe at the right rear fuselage and antennas as well as the anti-collision lights as described above.
PERU


[ area: 1,285,216 sq.km | population approx 34,3 million | capital: Lima | GDP 5,800 USD nominal per capita ]
For more information about the Peru Air Force, look at the Mirage page here...


...... at Las Palmas base aerea Peruana


... over Las Palmas / Santiago de Surco at Lima flying at 7000 ft.

The third Hasegawa T-33A kit was made similarly as described earlier and now for a BOLIVIA T-33A. These were Canadian T-33 Silver Stars and probably with the more powerful Nene engine. I assumed the external fuselage outlines were unchanged. But on the left fuselage aft of the turbine warning line, an extra exhaust hole is seen. This was suggested with a black dot. And it seems no fuel dump pipe is fitted.
There was an old Microscale set 72-408 but I was not sure about the sizes of the roundels. So for this model I designed my own decals that were custom printed similar as described above. The model would be finished in a bare aluminium scheme with ALCLAD.
Again decals for the markings were home designed and custom OKI laser printed. Various photos were studied and on the internet a lot can be found.

The home designed decals were set on the model. The rudder has the Bolivian colours, the decal was trimmed to size.

I was not sure about the lower wing roundel but assumed one to be there.
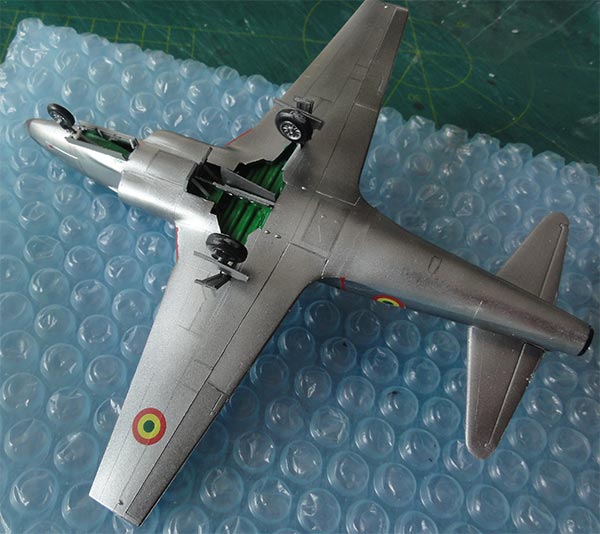
The cockpit got a pair of pilots as described above with the Peru model. The canopy was set closed with any small gaps closed with white glue and painted when dried. The Fletcher wing tip tanks were replaced with a pair made from scrap and got a black inside anti-glare section.
The landing gears were installed and painted as decribed earlier above.
Add the missing small pitot and antennas as well as the anti-collision lights as described above.
BOLIVIA
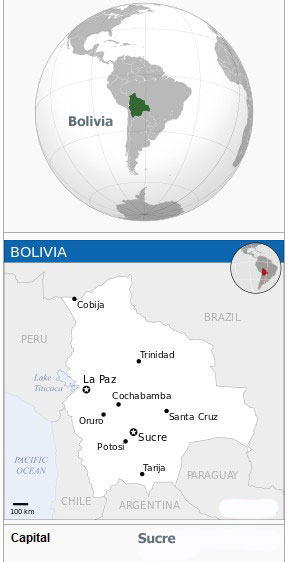


[area: 1,100,000 sq.km | population: 11,6 million | capital: Sucre with La Paz executive | GDP USD 3,700 nominal per capita ]
Some 15 T-33 jets were obtained from 1973, these being Canadian T-33 mk.3 Silver Stars with 5 to follow in 1977. From 1985 no less than 18 ex-French T-33SF were acquired as well and modernised by the Canadian Kelowna company. A few T-33's flew until 2017 in Bolivia!
Look for more information about Fuerza Aerea Boliviana the at the F-86 page here...


Note the small suggested exhaust aft of the turbine line, typical for Canadian T-33 Silver Star and the absence of a fuel dump.


... over the capital La Paz, Aeropuerto El Alto flying at 13,000 ft.

On to next [ Page 2... ]
References:
- T-33 Flight Manual, AN 01-75JC-1, USAF 1950
- F-80 / T-33, Koku Fan (Bunrin Do), FAOW no.63, July 1975;
- P-80 Shooting Star, T-33, F-94 in Action Air, Squadron Signal no.40, Larry Davis, 1980
- T-33, Wings of Fame, Aerospace publishers, no. 11, pages 114>
- T-33, Wings of Fame, Aerospace publishers, no. 16, pages 102>
Internet:
T-33 info on Wikipedia.
IPMS The Netherlands T-33 walk arounds
Check out my Platz T-33 modelling video on YouTube...
Check out my Italeri T-33 modelling video on YouTube
Back to 1/72 Models

(c) Copyright Meindert "designer"/ All rights reserved. Your comments are welcomed by webmaster
Created July 21, 2022