[ 1/32 ]
1/32 scale model: Kitty Hawk T-28 B/D Trojan
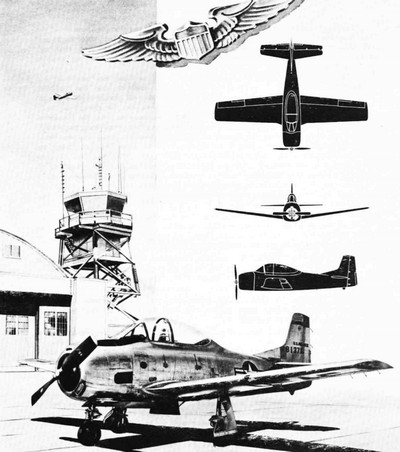

The North American Aviation company developed a piston-engined military trainer aircraft to be used by the USAF and US Navy in the nineteen fifties. It was known as the T-28 Trojan. The main versions were initially the T-28A with a R-1300 engine, 2 bladed Aero Products prop and high canopy hoods.
The T-28B got another engine, the R-1820, 3-bladed Hamilton Standard prop and another cowling and retained air speed brake. Also the nose wheel was smaller and a lower air speed brake fitted. It also got about 10 inch lower canopy hoods. This version could carry stores on two pylons but later on an upgrade 'Farm Gate" program on some aircraft enabled four pylons installment. These were used in the Vietnam war. Some T-28B's were also used by the US NAVY.
The next version was the T-28C being a modified trainer for the US NAVY, being essentially a "-B" with a tailhook. Sometimes a strake was fitted on the cowling.
In 1958/ 1959, the "Armée de l'Air Française" was involved in the war in Algeria, a French colony. The French needed a better ground attack capability and decided to get T-28's. But only second hand surplus T-28A's could be delivered and these were modified to a mere T-28B standard by Sud-Aviation in France and some 148 aircraft were modified and were called the Fennec ("desert fox").
The Fennecs got the T-28B style engine cowling and the Wright R-1820-76A engine of 1425 hp with a 3 bladed propeller was used. The cowling got also an additional smaller air intake on the cowling top for cockpit cooling. They got different six underwing hardpoints so 250 lbs bombs could be dropped or two pods French type .50 machine guns or rocket pods. The seats got armoured headrests and inside the cockpit some instruments and a different engine "reversed" throttle was installed. The total costs of these modifications were quite high once all French aircraft had been modified.
Finally the T-28D version was developed in the early nineteen-sixties to be used for ground attack and the counter insurgency (COIN) role. It got a strengthened wing enabling extra hardpoints/ pylons (up to six) and could utilize additional armament like Napalm bombs and rocket pods. The aircraft often was also fitted with armoured seats. Many T-28D aircraft were re-furbished and upgraded old T-28B's.
T-28's were operated during the Vietnam War. Particularly also from Laos starting August 1963 through "Air America" funded by the U.S Government, dozens of T-28's were flown for COIN and interdiction roles. (see references...).
Over 1,900 T-28 aircraft were manufactured. Many were used by the USAF and US Navy but aircraft were also delivered to foreign countries like the Phillipines, Bolivia, Honduras (and later Haiti).

T-28 photographed by me at Kleine Brogel Sept 2017. (registration 13288 ).
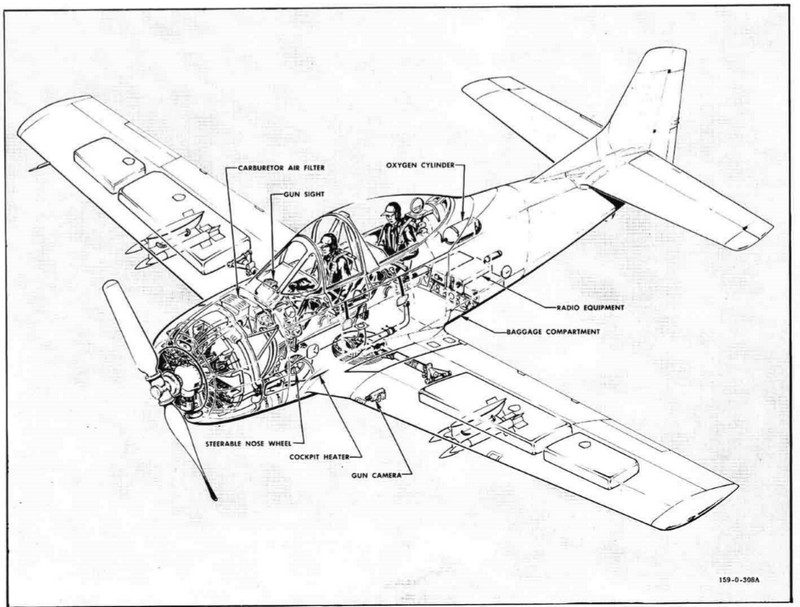
some pictures from an old T-28A manual
page 2
page 3
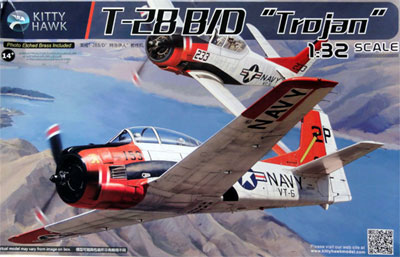
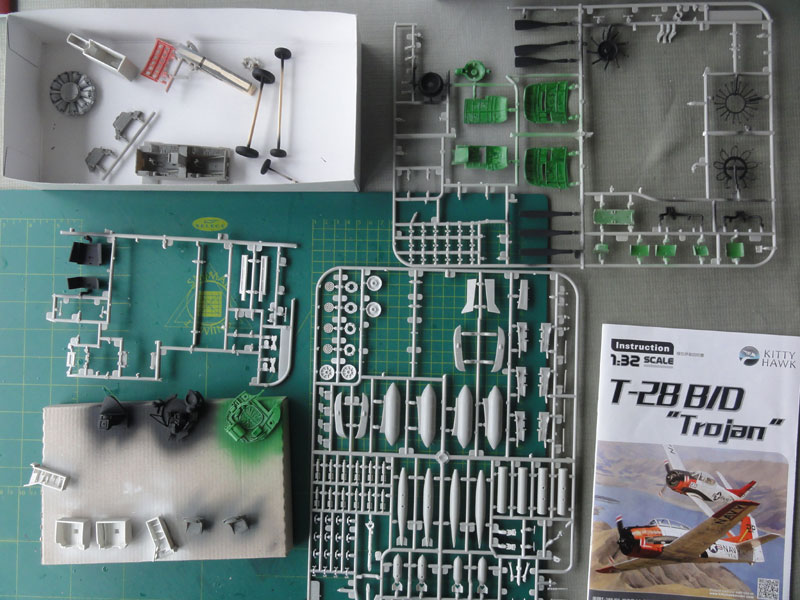
Kitty Hawk released a 1/32 kit of the T-28 B/D and it is the first T-28 ejection moulded kit in the scale.
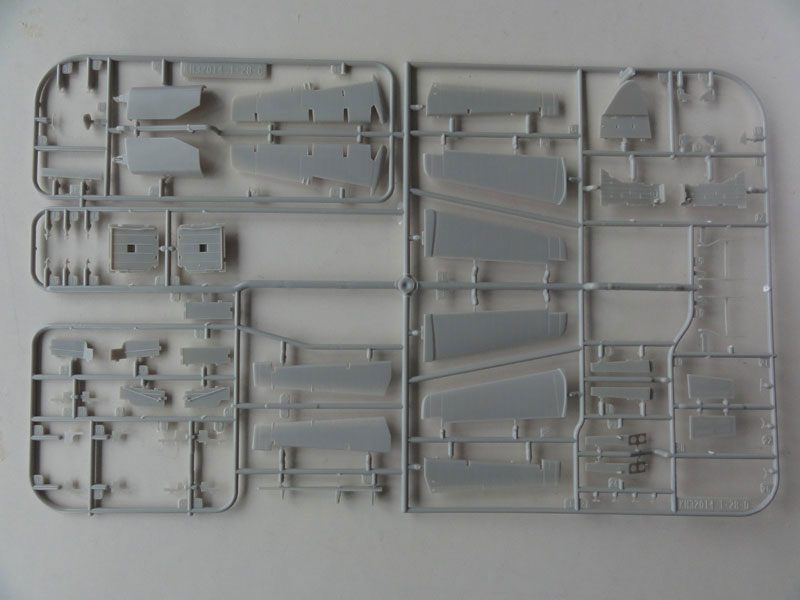
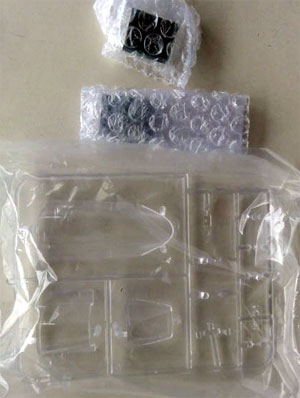
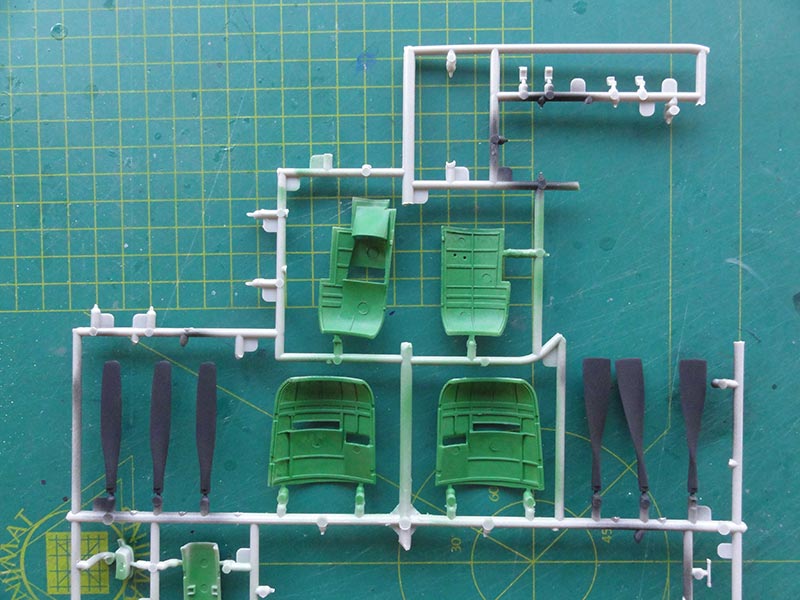
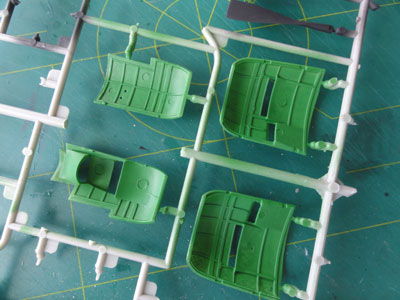
The parts look good but are a bit rougher than we are used to by other recent kits. Five large sprues with light grey parts, etched metal fret, metal weights, instructions and decals are seen in the fully packed box and there are about 350 parts.
A:

B:

C:
D:

E with the stores and wheels:
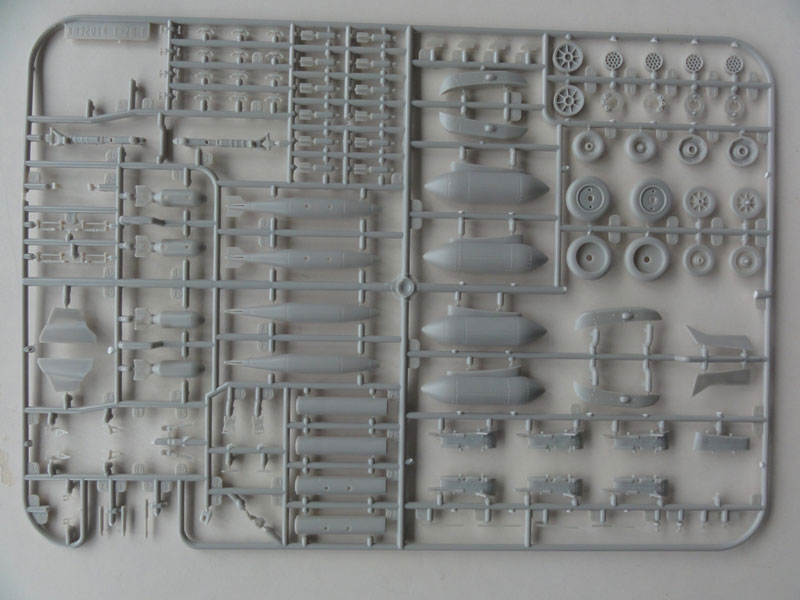
Stores are for what I think are....
2x mk.82 bombs
many small M1-A2 anti-personel bombs
2x LAU-32 rocket pods
2x gun pods of .50
2 NAPALM tanks ?
Finally in the kit are transparancies with a very nice windshield and canopy hoods and two small etched metal frets for the seat straps and intake grills. Also 2 large cast metal balance weights are provided to avoid "tail sitting", very nicely done! ( I later found still additional weight in the nose is needed!)

The Kitty Hawk kit comes with nice set of decals for no less than 7 T-28 schemes though only for 3 "operational aircraft":
(1) Thailand air force with a white - gull grey FS16440 scheme , coded 0-37711
(2) T-28D Philippine air force of 15 strike squadron in 1975
(3) T-28D JASDF, Japan 1965
... and some "later private / civilian Warbird" registred aircraft:
(4) T-28D in a French air force scheme (but now civil registred as F-AZFV); a Fennec marking is on the tail but the kit is not a Fennec.
(5) T-28B civilian aircraft VH-ZUC in a USAF high visibility scheme
(6) T-28D civilian aircraft NX766NA in a USAF Vietnam scheme
(7) T-28B civilian registred NX82AW in a US NAVY high visibility scheme of VT-6.
Some decal colours seem a bit off like very bright Japanese roundels and a bit strange coloured French ones.
Most indicated colour numbers are from Gunze Sangyo acrylics with the Fed.Std numbers and look correct.
The grey parts show a little flash, so needs a bit clean-up. Surface detail is inscribed and looks good. Parts attachments to the sprues are a bit thick and there are a lot of them. So use a fine razor saw to separate the parts from their sprues to prevent damage.
The kit looks good and has a good cockpit, and a nicely detailed Wright R-1820 radial engine inside the cowling. The cowl can be set open with two cowling doors.
To show the cockpit even better, the transparant canopy hoods can be set open and there is a lot possible for interesting displays. The many separate control surfaces look good. For a setting with the huge flaps down, some extra work is needed.
Some suggestions:
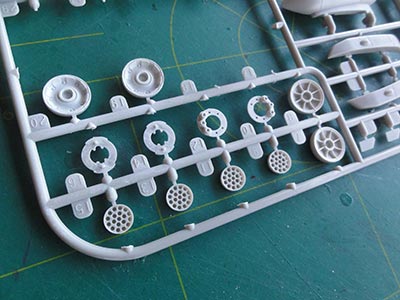
- Wheel hub parts F7, F8 are for the T-28B spoked wheels
- Wheel hub parts F19, F20 for the T-28D
- 2 choices of nose wheels: thicker wheels parts F19, F20 for the heavier T-28D.
- The lower tail parts C35 and C36 suggest that Kitty Hawk may release also a tail hook T-28C version.
- T-28D could be fitted with additional pylons whereas the T-28B or T-28C had initial provisions for two pylons (though there were operational modification programs to enable extra pylons as well).
- Later T-28D could be fitted with gun pods and the lower wing needs than some extra panels. Many also got armoured seats (not provided in the kit).
- Option for 2 types of propellers: three normal or wider chord propeller blades.
(For a T-28 FENNEC some extra conversion work would be needed such as an extra cowling intake, armoured head rests, some changes in the cockpit but especially another "blown" bigger canopy with roll bar that is difficult to make).
It is a good idea to choose first what particular T-28 you would like to model. Check photos and references as there are individual differences between T-28's though most of these differences are seen on Warbird aircraft privately flown. I have seen anti-collision lights in different spots, some different engine "plumbing' inside the cowling and differences in cockpit equipment.

I decided for a model of an operational "Air America" T-28B of LAOS, coded N.A. T-28B Bur.no “138146” c/n 200-217. This was an ex US Navy aircraft and flown from 1964-1965. It was one of 9 T-28s lost on 24 January 1965, when a fully armed RLAF T-28 exploded on the ramp of Vientiane airport in Laos; as a consequence of that incident several more bombs exploded, and flying metal also caused damage to a number of Air America aircraft parked nearby.
(Research credit courtesy Joe F. Leeker, see references at bottom op page).
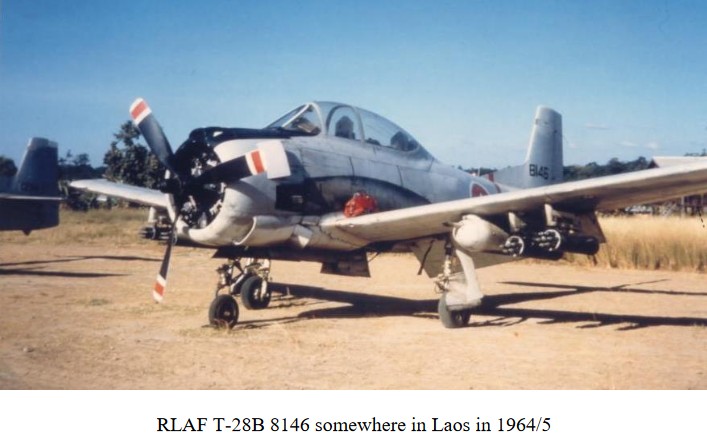
Credit: via publication Joe F. Leeker
For this scheme I would only than need to make my own LAOS roundel decals but this can be done. This T-28B still had the US Navy scheme of gull grey FS16440 and lower white finish and a red band at the rear fuselage. No roundels appear to be present on the wing but it has black walk way stripes.

OK, let's start the kit.
I often prefer to do some pre-painting first while most smaller parts are still in the sprues, this makes handling easier. So some attachment stubs were removed at this stage from the parts with a razor saw while keeping them attached in the sprue. Some clean up work is needed as well with a file.
The main colours as indicated in the excellent kit instructions were followed.
and seen from the other side...

The many panels on the insides were painted interior green (so not green chromate primer).
Continueing assemblying the kit.... (the order of STEPs may differ from the instructions for more easier assembly)
STEPs 1-2
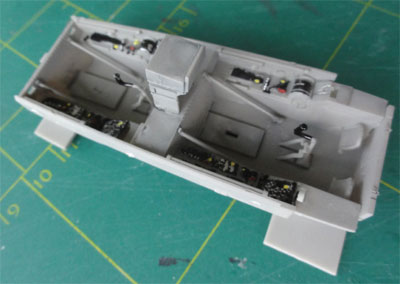
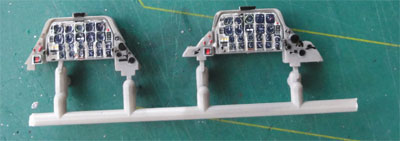
The cockpit details are great as per kit. Research is well done by Kitty Hawk, though still additional details can be added in this scale. First, parts were installed as per kit. There are rudder pedals though the control sticks seem a bit thin.
Decals are provided for the instruments but I prefered a mix of cut out instrument decals also using a decal softener (such as DACO) and paint work on the raised detailed instruments.
The seats were not yet tackled, to be done later as well as additional details.
Leave STEPs 3 and STEP 4 with the nose gear for later on.
STEPs 5-7
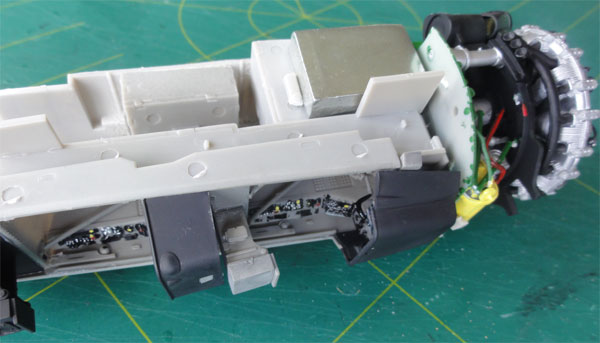
The R-1820 engine is very nicely done with enough details and spark cables. The idea is to either set open the cowling doors and show the engine or to set these closed. I will set one cowling door open.
On the main engine parts E41 and E42 remove the moulding pips for a good fit.
On the presumed cooler E24 I only installed the grill PE13 at the rear. The cowling door will be set open later on.
 ..
..
I later found that for a (half-) closed cowl I had to cut a bit the upper engine rod cap parts E26. Also, the central crankhouse is light grey, not green as painted here.
Engine is installed on the structural rods and forward fuselage bulkhead.
Yellow is probably the oil tank. I saw in the IPMS NL walkaround (see references) that sometimes additional "plumbing" is seen inside particularly on Warbirds. Also some additional wiring is seen so I will add these as well.


STEPs 8-11
This fuselage closure is done. The model is a genuine tail sitter, so ensure to use the large ballast weights next to the nose gear bay as far forward as possible. Two casted metal weights are provided for in the kit! Do not glue them too much forward to avoid interference with the cowl parts.
I later found that still EXTRA weight was needed. So when you close the cowl, ensure to install even extra weight before closing up the cowling.
Extra cockpit details will be added later.
A small vent hole was drilled in the left fuselage halve above the wing root. Its position is engraved in the kit.

Some clamps were used while the fuselage assembly dried for 24 hours...
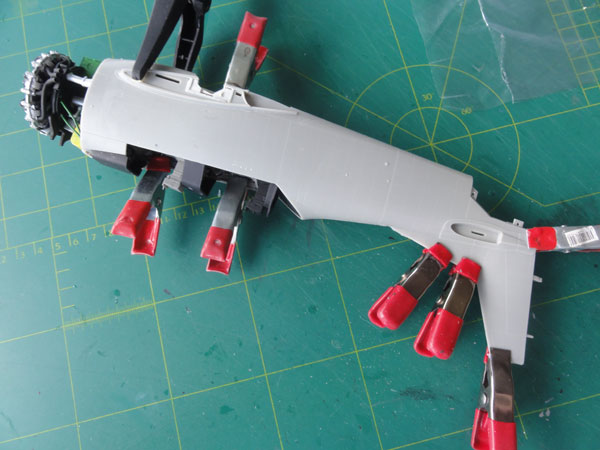

In the rear tail spar (not indicated in instructions, it is part 28), some weight saving holes were drilled.

STEPs 12-15
I opted to show the engine with the left side open cowling door. Positioning and closing the right door with the lower and upper fairings turned out to be difficult.

I had cut a bit the upper engine rod cap parts E26. Still, some putty is needed though not at all edges as obviously there is a gap with a closed door.
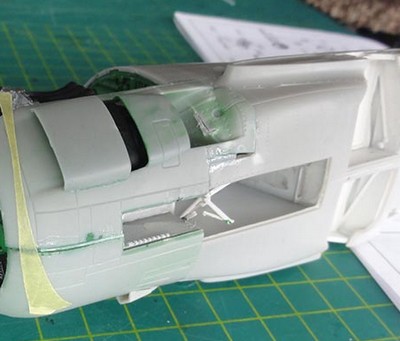
I than needed filler / putty in some areas, particularly the areas around the nose gear bay and the lower cowling areas.
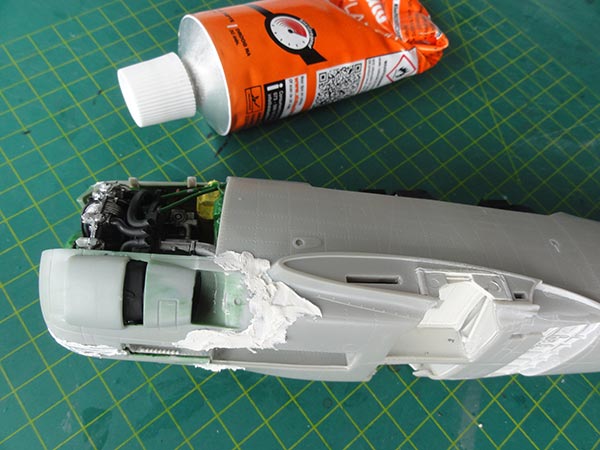
( The nose gear and doors were obviously not yet installed ).
.... and the sanded area...
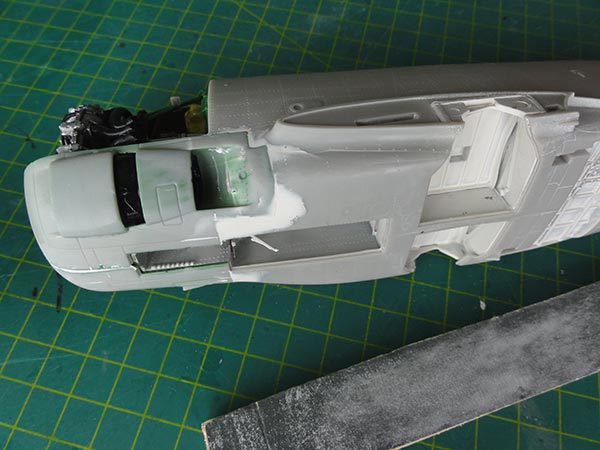
At the front of the cowling it was difficult to achieve a good circular fit and a good alignment. It needed some putty and sanding as well. The smaller cowling doors are to installed later on.
The rear tail panels C35 + C36 at the end of the fuselage were installed, some putty was needed. (these loose panels suggest that Kitty Hawk may release the T-28C version with a tail hook later on?).
The large lower airbrake B23 was not set in position yet, though I later found it was better done at this stage. It is mostly seen closed. The kit part proved not to fit and needs trimming and white glue to close gaps.
On to next [ Page 2.... ]
References:
T-28 Trojan, Squadron Signal in Action series #89
T-28, Naval fighters series #5, Steve Ginther
Operations over Laos, Air America: The Aviation Historian, no. 2, 2013
Web:
IPMS Nederland T-28 Walkarounds
Air America T-28 operations, bij Joe F. Leeker, UT Dallas
Back to 1/32 Models.......

(c) Copyright Meindert "designer"/ All rights reserved. Your comments are welcomed by webmaster
Created this page
July 9, 2017