[ page 6 ]


1/32 scale Bolkow Bo-105 CBS conversion
... continued from page 5...
The
Dutch ANWB (formally the Royal Dutch Touring Club or Koninklijke
Nederlandse Toeristenbond) is the largest not-for-profit association in
the Netherlands, serving over 5 million members. Founded in 1883
originally for cyclists, hence "Wielrijders" for cyclists. Since than, ANWB has evolved into a comprehensive mobility
and tourism organization comparable to the German ADAC or the British
AA.

The ANWB also used BO-105 CBS-4 helicopters for its "Lifeliner" trauma service:
Lifeliner 1: Started operations on May 1, 1995, using a Bo-105 CBS (registration PH-NZY, later PH-KHD).
Lifeliner 2: Added in 1997 at Erasmus MC Rotterdam, also using a Bo-105 CBS (registration PH-NZX, later PH-KHE).
These
helicopters were crucial in establishing the Netherlands' first
civilian air ambulance network. They saved a lot of lifes.
The Bo-105 CBS model was chosen by the ANWB for its stretched
fuselage (25 cm longer than the standard CB), which provided the
necessary extra space for medical crew and equipment. The ANWB's Bo-105 fleet was in service until 2004–2005, when they were replaced by the newer Eurocopter EC-135 helicopters < see modelling report

It was decided to make a 1/32 scale Bo-105 CBS model of the ANWB and this would need a conversion.
As each ANWB Bo-105 CBS helikopter was a bit different, it is best to pick one and use
photos to detail the model.
There were variations in fairings, schemes etc. also during the service
career of a particular helicopter. I picked the yellow Bo-105 CBS ANWB
with registration PH-KHE. It would also be needed to home design
and make custom decals, more about that later on.
As
the Bo-105 CBS PH-KHE was used over 20 years ago it was even for me as
Dutch modeller not easy to find photos, particularly of the interior. I
looked through some Dutch aviation magazines and found an article or
two such as in "maandblad LUCHTVAART Januari 1998". But enough
information to make a model through a conversion.
This modelling report will discuss the needed conversion to get a Bo-105 CBS in this scale.
Page 2
Page 3
Page 4
Page 5
Page 6
There is in 1/32 scale only an Italeri/ REVELL
Bo-105 kit and several models had been made as seen on pages 1
- 5.
I had an old Italeri kit
that had been half-assembled ages ago but never finished. This one
would be converted. But any (new) Revell Bo-105 kit in 1/32 will do if
you want to do this conversion.


The Bo-105 CBS is 25 cm longer than the standard Bo-105 with a fuselage plug af of the main cabin doors with an extra window on both starboard and port sides. In 1/32 scale thus a plug needs to be inserted of 8 millimeter. The plug is clearly visible.
I converted an old half
made model where the fuselage has been assembled. You will see that the
interior had already been painted.
To retain strength, it
was decided to make two vertical cuts and only open up a forward door
at port and keep the other doors closed.

Two vertical cuts were made: aft of the main cabin doors and at a different station location, more forward in the lower belly.


As the plug
should also
have a window on each side it was decided to make the plug from
bendable polystyrene transparant sheet. (on the photos still has
protective blue sheet on it). The strip for the plug was 8 millimeter
wide.

The sheet was glued with superglue (but not at the window location). Inside at less visible places, plastic strips at the joints were set to get extra strength. The floor was also lengthened at the rear of the cabin with plastic card.


Putty and sanding was
needed. The transparancies were protected with tape, also on there
insides. The two extra CBS plug windows were also covered with
correctly shapes tape covers.


A medium grey primer
coat was airbrushed to check with my favourite Revell Aqua 75
"steingrau". This revealed some more effort with putty and
sanding.


I found out a bit late that also the skids of the CBS are longer as well. Estimated with photos about 25 cm so 8 millimeter in 1/32 which is logical. The skid add ons varied between helicopters with extra steps etc. The plastic parts were cut. With a pin vise, tiny diameter holes were drilled in the skids and metal pins and plastic tube strips set. All was shaped smooth.


For extra strength at the belly
attachments I also drilled holes to get extra metal pins. Metal needles are
perfect for these.
The ANWB Bo-105 CBS
"PH-KHE" CBS skid has an extra add on: a pair of step bars and also flat plates at the
rear, all was made from rod and plastic card.

The stabilizer and end plates were also installed. I had the impression that the vertical end plates need to be set at a slight angle.
The main work for this
conversion was now completed. Note that the interior cabin is still
open. Masking was done on the cabin insides'.
The model got a base grey primer again and all looked OK.
It was time to airbrush the paint scheme. I forgot to make a few photos at this stage.


For the ANWB yellow RLM04 was picked Gunze Sangyo Mr.Hobby H413 acrylic paint. For the orange areas such as at the stabilizer and fins a mix of 50% H14 + 50% H23 red. As done with other models, it is good to airbrush some bits of aftermarket plain decal sheets in these colours as well; these may come in handy if repairs are needed later on.
Masking was done throughout, particularly at the transparant areas such as windows and cabin glazing front.
The skids got a black colour (sometimes grey skids were seen on ANWB Bo-105 CBS). On the belly some flat fairings and a search light panel was added from scrap.

Here it is seen that the window masking tapes were removed. I set new ones a few times during the conversion to get fresh edges. Any paint spills though can be scarped off with a wooden tooth pick.


The cabin was not yet closed. I did not find good interior
photos so had to guess a bit what was inside. It had been decided
earlier therefor to only set the forward door a bit open.
The cabin main interior colours were painted grey FS36495.
Only a single pilot
flew the ANWB helicopter so the port control stick #B12 and collective
#E6 parts were not installed. (if you have a Revell Bo-105 kit with
armed sytems, obviously donate these to your spares' box). I also added
a foot plate for the port crew Lifeliner member. The
seat were painted light grey including the
cushions. Some traps/ belts were added from scrap. I used tape slices
and buckles from etched metal found in the spares box. Some
Lifeliner emergency health equipment was added from scrap. I also made
a new instrument panel from card and drilled holes for the "clocks". A
back plate was set and a decal for each clock.

Again, I forgot to make a few photos...
NOTE: some Bo-105 kits have moulded rain wipers in the glazing. The ANWB helicopter had only one so look at the glazing part and sand and polish any raised wipers if necessary. . My old kit had no moulded wipers so no issue here....

The doors and large bubble glazing part #C23 were also airbrushed after they had been masked.

For the front "intake" of the rotor fairing a kit part
is provided and there are variations between Bo-105. Probably this is
an adjustable intake cover that the ground crew can change. I installed the
kit part and it was painted off white.

The large cabin glazing was installed. The frames had already been painted. When set still there were a few
tiny gaps and these were closed up with white glue.

When dried, the dried
white glue edges were hand painted yellow H413 with a fine brush.
On the lower tail boom ANBW Bo-105 CBS PH-KHGE also has a large black
fairing with unknown purpose. It had to be made from scrap. Below the nose at the landing light also a raised fairing was made.
The
model was ready for the ANWB livery.
For the livery, ANWB Bo-105 CBS PH-KHE decals were home designed and custom printed. This took obviously some effort with the computer graphics program. There are not a lot of decals. On the belly PH-KHE has a large black registration. (note: other ANWB helicopters may have orange chevrons on the belly).


The decals are laser printed on continuous decals sheet so all individual markings need to be cut out with fine scissors. (if you want these decals for your model, let me know...)
The model surfaces were glossy so ready to get the decals.


The added detail on the belly as well as the white Erasmus titles are also clearly visible.

The 2 exhausts parts #B26 were "flattened a bit" with a plier and set and the side exhausts were also installed. All was painted black.
The lower rear protector plate #D28 was set on a few stubs leaving a gap and had been airbrushed earlier yellow.
The converted CBS skids were set with superglue. They had obtained earlier some extra metal pins for extra strength.

The main rotor blades were airbrushed grey Gunze Sangyo Mr.Hobby H61 (FS36495) and they got after masking an aluminium edge airbrushed. The tips were airbrushed yellow.

On each blade, a coloured ring was painted red/blue/green/yellow that helps to determine a particular blade for balancing (not seen yet in the photo). The shaft and the rotor hub was painted aluminium.
The tail rotor was also also airbrushed in the same colours. Here you see an outdoors visitor...

All was installed. The orange tail bar was set as were the orange horizontal scrap skid plates.
The port door was set slightly open, some tiny door handles from scrap installed as well. I saw on this door only a ventilation slide panel with white frames, this was suggested with white decal lines.
A few anti-collision lights were set made from clear sprue or bits I had. Two large antennas on the cabin roof were added from white stretched sprue (the kit parts are too thick).
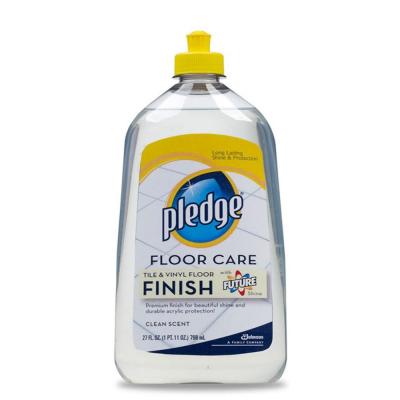


A final gloss varnish was airbrushed: acrylic Johnson Future/ Pledge wth some 10% Mr.Color levelling thinner mixed in; this thinner is a lacquer but strangely helps the future varnish tiny air drops to break and level. Obviously shield off the transparant windows when applying the varnish coat. This gloss coat gives a nice even sheen and protects the decals.
The main rotor was set "loosely" and that completed a special model: a conversion for an ANWB Bo-105 CBS in 1/32 scale.


ANWB Bo-105 CBS registration PH-KHE "Lifeliner 2" with main base at Rotterdam Erasmus medical center, Rotterdam city, The Netherlands. About year 2000.

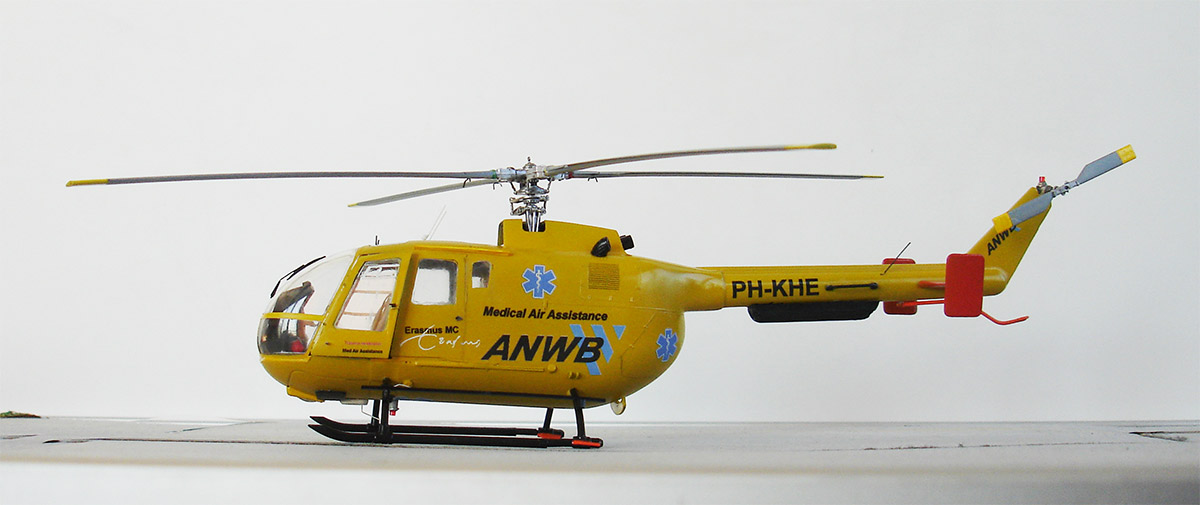

... set in a scenery...


A nice ANWB 1/32 Bo-105 CBS model is now in the collection.
Back to 1/32 Models.......

(c) Copyright "designer"/ All rights reserved. Your comments are welcomed by webmaster
August 25, 2026